Monday 31 May 2010

Walnut Catkins

The walnuts just seem to be going on - I said this would be a recurring theme for the year! The catkins have fallen with a vengeance - there is a huge carpet of them all around the trees, but I collected about a kilo to experiment with.

The first thing I noticed was that although they looked very green as they were falling, they quickly oxided to a browny black. I was a bit concerned that this would affect the colour as Ethel Mairet is so adamant the with the husks they must be green, however the only way I could avoid them going brown would be to collect them before they fell - I may try that next year, but certainly for this year want to see what the crop is like and what happens at each stage.

I always do the same thing when experimenting ( unless I have read something specific like need to soak in alcohol) it gives me a good overview of how a dye works. So to start with I soaked them in cold water for a couple of days. As it was so hot and sunny last
week they actually started to ferment a little, g
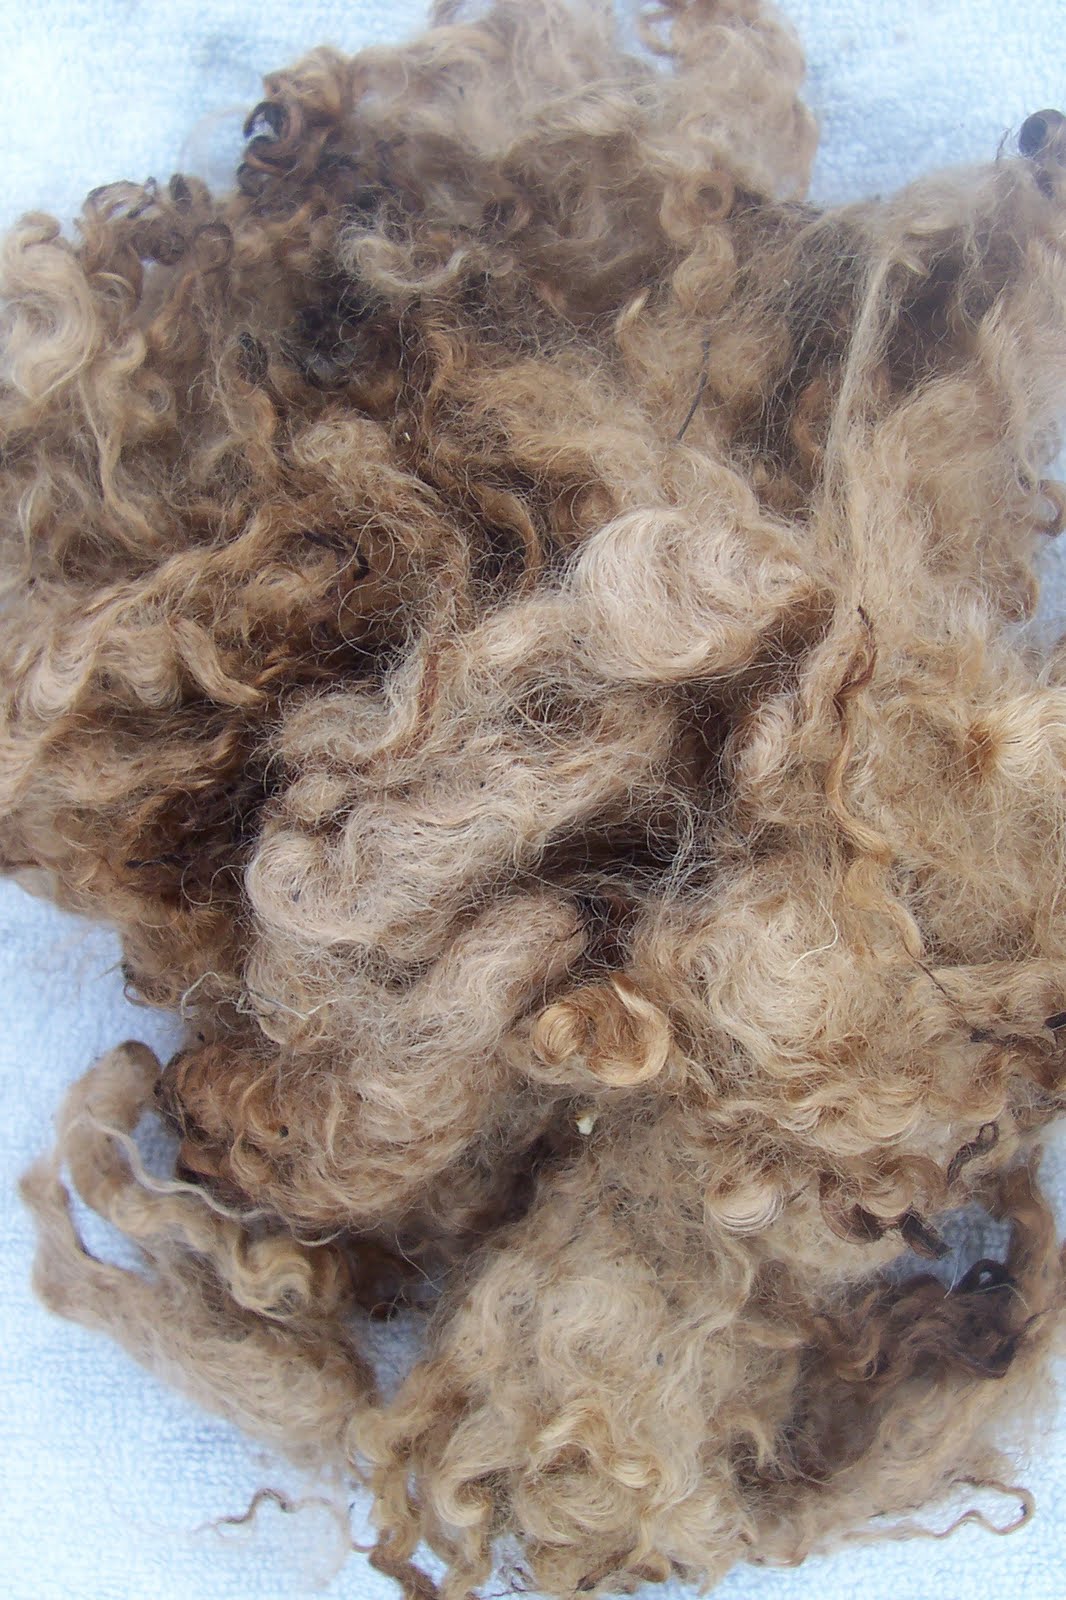
etting "frothy" at the edges of the pan. Then I brought them up to the boil and simmered for about an hour. I let them cool down and "rest" overnight. They were then strained and the fibres added, heated to simmering and kept there for an hour. After cooling to hand hot the fibres were rinsed and put out to dry. (You can see the colour of the dye liquid underneath the collander in the pan.)

I am really impressed with the colour - it's more golden than it looks in the picture, really quite lush! I will certainly be collecting them again next year and using lots of them. I dyed a kilo of "Blarty" with them and then a T shirt and then a 300g hank of wool. The exhausts were quite pale, but very pretty!

I am now scrabbling round collecting the little nuts that have fallen in the wind over the weekend - waste not want not!!!

Thursday 27 May 2010

More on Walnuts

I must have been feeling particularly thick the other day when I said some catkins had fallen in the wind. Catkins are falling at a rate of knots, it's like a carpet all round the trees. Where they have fallen from there is now the nut forming between the leaves, so many of them I'm beginning to think I'd better do some pickling as well as dyeing!

I've been re-reading Ethel Mairet, who says that walnut husks have to be used green - once they have oxidised to brown it is too late and they won't dye properly. This got me thinking - if we can "reduce" indigo with thiourea dioxide why don't I try it with the brown walnut husks to see what happens.

I tried 3 different methods.

Method A

100g walnut husks were put into 50 degree water and soaked overnight. The next day the liquid was heated to boiling and they were simmered for an hour. Then allowed to cool overnight. The next day the husks were strained out and 100g pre mordanted Blarty fleece was added to the pan (I didn't have any scoured that wasn't pre mordanted otherwise I would have used that) The pan was heated to boiling again and simmered for 1 hour. Allowed to cool and the fleece removed, rinsed and put out to dry.

Method B

100g walnut husks were added to 50 degree water plus 1 tsp thiourea dioxide. A lid put on and the husks left to soak overnight (I checked the colour of the liquid both night and morning and there was no difference) The husks were then heated to boiling, simmered for 1 hour and then left to cool overnight. The next day strained and 100g pre mordanted Blarty fleece added, heated again and the rest of the experiment as for A.


Method C

100g walnut husks put into 50 degree water and left to soak overnight, the next day heated to boiling and simmered for 1 hour. Allowed to cool overnight. The next day they were strained out and the liquid heated back to 50 degrees, 1 tsp thiourea dioxide added and left to "reduce" for 2 hours. 100g pre mordanted Blarty fleece added and left to soak in the liquid overnight - I did not heat again with this fleece, it was left in teh air for 1 hour to see if anything happened, then rinsed and left to dry.


There are definitely differences between the three lots of fibre in terms of the colour produced. Method A is a more "orangy" brown, method B is what I would describe as a "truer" brown, method C is fawny. I think that method C has lost out on the extra heating so there is less uptake of the dyestuff - of the 3 methods I would try B again to see what happens in larger quantities.

I am particularly interested in experimenting with the fresh husks now though - to see if I can get them whilst they are green rather than turning brown.

Sunday 16 May 2010

Walnuts

I mentioned briefly that we have 2 Walnut trees growing in the garden and that I want to do some experiments. I'm actually very excited about the trees - I've only ever got pale fawns from the dried husks that you can buy - unless I add iron or copper as a modifier. In fact I am more likely to choose Cutch than Walnut if I want to produce a brown. It's actually very frustrating, because the bath is always a really rich, thick brown colour and whatever is being dyed looks gorgeous until you squeeze it out! Anyway this is going to be the first of probably many reports throughout the next year on the experiments and their progress.

So to start - here are the 2 trees. One has leaves and catkins, the other only buds and the beginnings of catkins. From these I would say they are both Juglans Regia, which originated in Asia Minor, but long ago became naturalised to to temperate climates of Europe. The king of trees, they were highly valued by the Romans - Pliny gives a recipe for dyeing hair to stop it going white and the use of fermented husks is recorded in the early days of dyeing in Persia. (Juglans Nigra or Black Walnut is originally from Central and Eastern America, also quite common in Europe as well now but obviously from a much more recent date)

This image shows the catkins and leaves quite clearly. According to John and Margaret Cannon the catkins can be used to dye I wasn't going to take any this year thought that that would be a later experiment, however it's been pretty windy today and several have been blown down, so I've collected them and will try them during the week.(I only thought the leaves and husks were used, but the roots also get included to get darker colours, they're collected before the sap begins to rise).

I have dyed with dried leaves and had some really lovely results - research so far recommends collecting in early summer, so I'll try some fresh leaves in July. The walnuts themselves may be quite a lengthy process. The recommendations seem to be that they are collected when green, covered with water and a lid to keep them from oxidizing and then stored for - some say 1 year others 2.

As I do the experiments I will give my sources and results. According to Cardon the most common colour obtained from walnuts on their own is fawn, it would seem that you have to combine with madder or indigo to get darker colours, I'm hoping to try as many different methods as I can to build up a good knowledge of their potential.

Thursday 13 May 2010

Pictures

Back in 1988 my father commissioned a picture, which I have always loved. It's a sea battle - the action between the "Java and Constitution" one of the famous battles from the War of 1812. Constitution won - she's in Boston harbour to this day. (painted by D MacLeod, of St Ives, Cornwall)

I can spend hours staring at the picture (my photo does not do it justice, it isn't a light shining on it in the middle that's the cannon fire!) - the sea has so much movement and there are different nuances depending on the time of day or the light around it. I have always preferred pictures that are almost a photograph, I can't deal with distortions or "fuzziness". That doesn't mean I can't appreciate a skill or talent - it's just not what I want to look at on my wall. Oh and yes that is Tigger you can see under the picture - he's a phone - if you look around the rest of the lounge you may see one or two more

Back in the early '90's I joined a renenactment group and decided that my "character" would be a 17th Century embroideress, so I enrolled at the local college to do the City and Guilds in Embroidery. Well so I thought; I had to do "Art and Design" as the full title tells you (I somehow missed that when I enrolled!) After nearly walking out there and then because I am not artistic (I was told at the age of 14 that I MUST drop art as I was useless at it and I took that to heart as you do at that age!) the lecturer persuaded me that it was worth persevering for a few weeks and I have to say that she was FANTASTIC in her encouragement and enthusiasm, (her name was Gail Jones, she was a weaver and ultimately a miliner with her mother, but where she is now I have no idea!) so continue I did and even completed the course and came out with the full qualification, a knowledge of how to produce design boards and how to turn a design or small picture into a textile that I actually like! (How else could I have made the flags last year?!) In case you're interested here's one of my pieces:


The reason I am rambling about all this is, on the course I met a lady called Helen Melvin who is incredibly artistic. We became good friends, amongst the various finished pieces we had to produce for the course Helen made a felted picture - a Waterfall (I'm not sure if it was her first picture, but I'm pretty sure it was her first Waterfall), I fell in love with it and used to sit and gaze at it on the wall at her house, but could never afford to buy it (I didn't really think she wanted to sell, but eventually a member of her family managed to prise it off her wall!) When I knew I was moving away I asked Helen to create another Waterfall - for me, my very own commission! Personally I think they are a speciality, she produced Waterfall 3 which has now moved over to France. (Helen talks about the picture on her blog here ) It's not reached my wall yet, it has pride of place on the settee in the lounge where I can admire it anytime I want to, I'm trying to work out where the best place is to get the full benefit!

Thanks Helen - I love it!